
AdGuard Home on a VPS
Introduction
In this guide, I will walk you through setting up AdGuard Home on a VPS and configuring it to work with your router using WireGuard VPN. This setup will ensure that all DNS requests from your home network are routed securely through the VPN to AdGuard Home for filtering.
AdGuard Home setup for secure DNS filtering.
What can you do with this setup?
- Block ads, trackers, and malware on all devices in your home network.
- Filter specific services or websites.
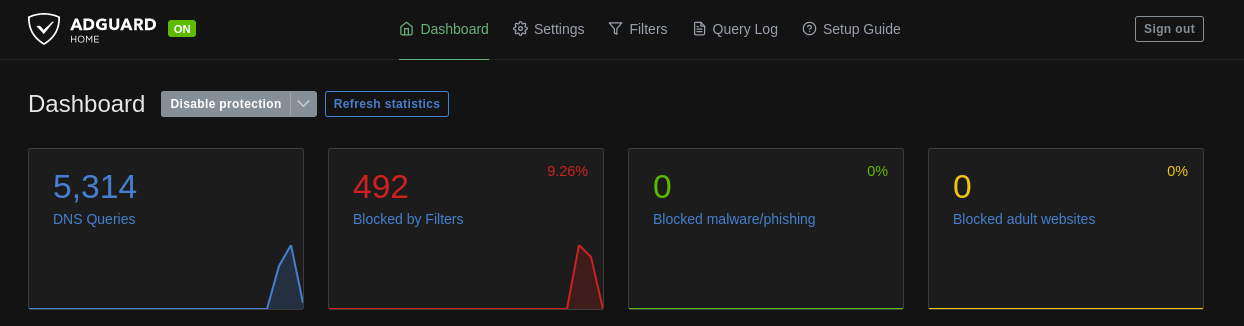
- Track and monitor DNS requests from your network via the AdGuard Home dashboard.
Why use a VPS?
Using a VPS for AdGuard Home is not a requirement. In fact, I recommend running it on a Raspberry Pi or similar device in your home network if you have the option, as the setup is easier.
I did not have a spare device available, so I decided to use a VPS which I already rent for hosting different services. This setup also allows you to use your DNS anywhere by connecting to the VPN.
Security Aspects
Self-hosting a DNS service on a public IP allows attackers to utilize your VPS for DNS amplification attacks. Therefore, we do not expose port 53 to the public internet and use a VPN connection to only allow requests from the home network.
Prerequisites
- A VPS with a public IP address.
- A router that supports WireGuard VPN.
Step 1: Set up WireGuard on the VPS
1. Install WireGuard
sudo apt update
sudo apt install wireguard
2. Generate Keys
On the VPS, generate a private and public key for WireGuard:
wg genkey | tee privatekey | wg pubkey > publickey
You will also need a private and public key for your router, which you can generate in the same way on a device where you can access the router dashboard.
3. Configure WireGuard
sudo nano /etc/wireguard/wg0.conf
Add the following configuration to the file:
[Interface]
Address = 10.0.0.1/24
ListenPort = 51820
PrivateKey = <YOUR_VPS_PRIVATE_KEY>

[Peer]
PublicKey = <YOUR_ROUTER_PUBLIC_KEY>
AllowedIPs = 10.0.0.2/32,192.168.178.0/24
The AllowedIPs range should include the IP address of your router and the IP range of your home network.
4. Enable IP Forwarding on the VPS
echo "net.ipv4.ip_forward = 1" | sudo tee -a /etc/sysctl.conf
sudo sysctl -p
5. Start WireGuard
sudo wg-quick up wg0
Check the status of the WireGuard interface:
sudo wg
Step 2: Configure WireGuard on the Router
These steps can vary depending on your router model. Here is an example for a FritzBox router:
1. Navigate to the VPN settings in your router dashboard
Internet --> Permit Access --> VPN (WireGuard)
2. Add a new connection
Save the following configuration to a file on your device:
[Interface]
PrivateKey = <YOUR_ROUTER_PRIVATE_KEY>
Address = 192.168.178.1/24  # IP address of your router

[Peer]
PublicKey = <YOUR_VPS_PUBLIC_KEY>
Endpoint = <YOUR_VPS_PUBLIC_IP>:51820
AllowedIPs = 10.0.0.1/32
PersistentKeepalive = 25
The AllowedIPs setting ensures that only traffic directed to the VPS is routed through the VPN, so you do not have to worry about impacting the performance of other services.
Import the configuration file in the router dashboard and activate the connection.
3. Check the connection status
Check the WireGuard connection on the VPS:
sudo wg
You should see the router as a peer with a handshake.
Check the connection status on the router dashboard. In the FritzBox, you can see the connection status in the VPN settings marked with a green dot.
Check the connection on a device in your home network:
ping 10.0.0.1
Step 3: Install AdGuard Home on the VPS
1. Download AdGuard Home
wget https://static.adguard.com/adguardhome/release/AdGuardHome_linux_amd64.tar.gz
tar -xvf AdGuardHome_linux_amd64.tar.gz
cd AdGuardHome
2. Install and run AdGuard Home
sudo ./AdGuardHome -s install
3. Access the AdGuard Home dashboard for the initial setup
Open a browser and navigate to:
http://<YOUR_VPS_PUBLIC_IP>:3000
If there is no UI on your VPS available, you can access the dashboard via SSH tunnel:
ssh -L 3000:localhost:3000 user@<YOUR_VPS_PUBLIC_IP>
Then open a browser and navigate to http://localhost:3000.
4. Configure AdGuard Home
- Set up strong credentials for the dashboard access.
- Set the DNS server interface to
wg0(the WireGuard interface) 10.0.0.1 and the DNS port to 53. - Configure the upstream DNS servers, blocklists, and other settings.
Step 4: Adjust the firewall settings on the VPS
Allow DNS requests on the WireGuard interface
sudo iptables -A INPUT -i wg0 -p udp --dport 53 -j ACCEPT
sudo iptables -A INPUT -i wg0 -p tcp --dport 53 -j ACCEPT
Step 5: Configure the router to use AdGuard Home as DNS server
- Navigate to the DNS settings in your router dashboard.
- Set the primary and secondary DNS servers to
10.0.0.1.
Potential additional steps
- Ensure no alternative DNS servers are set in the router settings; otherwise, blocked domains might still be resolved via other servers.
- Disable IPv6 DNS if you are not using it, as it might bypass the AdGuard Home setup.
- Configure AdGuard Home to use DNS-over-HTTPS or DNS-over-TLS for additional security (not covered in this guide).
Step 6: Verify the setup
1. Check DNS resolution
On the VPS, run the following command to listen to DNS requests on the WireGuard interface on port 53:
sudo tcpdump -i wg0 port 53
On a device in your home network, run the following command to check if the DNS requests are routed through the VPN:
nslookup example.com
You should see the DNS request in the tcpdump output on the VPS.
Check the AdGuard Home dashboard to see the DNS requests and blocked domains.
Troubleshooting
If blocking or enabling certain domains does not work as expected, verify the following:
- Clear DNS cache on the device.
- Check if the device is configured to use another DNS server specifically.
- Clear browser caches.
Conclusion
This guide has shown how to use AdGuard on a VPS in combination with WireGuard to filter DNS requests from your home network. In general, this setup is more complex than running AdGuard Home on a Raspberry Pi, but you do not need a dedicated device for it. This setup could also be potentially replicated on free tier cloud providers, giving you a fully free ad blocking solution.